Over the past several years, the world has witnessed the explosion of a new industry – drones! With advances in technology, driven primarily by the smartphone industry, we have seen these machines transform from a luxury toy at the mall’s novelty store to the stars of a new, high-adrenaline sport with its own ESPN coverage. If you’re anything like me, it’s hard to watch these drones seemingly defy gravity and laugh in the face of Newtonian physics without wanting to get in on the action. But if you’re new to drones, it’s easy to become overwhelmed trying to determine what your first purchase should be. But fear not! This post will help you pick out your first starter drone!
THE HUBSAN
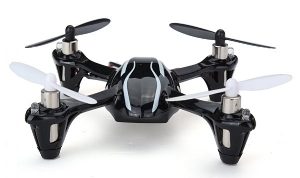
 Whether you’ve never flown a drone in your life, or you’ve logged a few hundred hours of flight time, the Hubsan X4’s cheap price and sturdy frame make it an excellent choice for both a starter drone and a convenient option for honing your stick skills. Seriously, for <$50 you aren’t going to find a better quadcopter to introduce you to this awesome hobby. I actually got my start with modern quadcopters by using the Hubsan to fly around obstacle courses I created in my dining room and chase my cat around the house. Of course, in the beginning I was crashing all the time – but that’s part of the learning process! The props are plastic and are easy to pop on and off if you need to replace them. I’d also recommend picking up a crash pack and some extra batteries. Each battery will get you around 5 minutes of flight time, which is pretty good for those small batteries, but takes about an hour to recharge. So you’ll definitely want some spares to really get some meaningful flights.
The Hubsan has two flight modes: normal and expert. If you’re brand new to flying robots, stick with the normal mode for a while – get used to flying around obstacles and try to fly the quad with it facing toward you (so your controls are mirrored). Once you think you’re ready to see what this little puppy is capable of, push the right control stick into the controller until you hear a click; this will put you into expert mode and you should see the light on the controller change. Expert mode increases the controller sensitivity and the angles to which the drone can tilt. This allows the drone to fly much faster and behave more aggressively than when in normal mode. Going from normal mode to expert mode is going to feel like you traded in your minivan for a new Aston Martin. So make sure you are in an area with a lot of open space and have some spare parts handy the first time you go into expert mode.
One final bonus perk of the Hubsan is that, since it weighs less than 0.55 pounds, you don’t need to register it with the FAA. You can find out more information on the FAA website.
THE RACER
 Once you’ve got some stick time on the Hubsan, you may be itching to upgrade to something with a bit more power and flight capability. For that, I’d recommend the 250 quad racer!
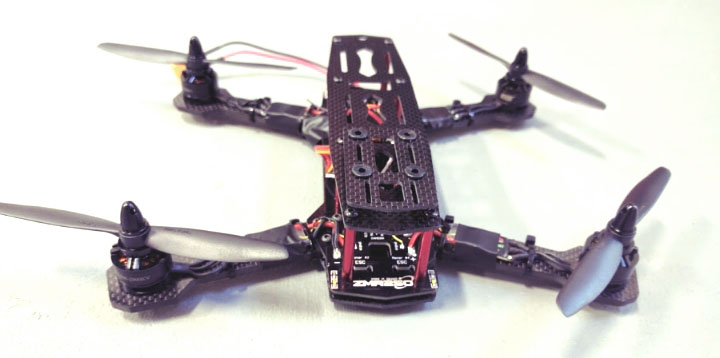
The 250 quad gets its name because it is 250 millimeters between diagonal motors (you’ll also find 350mm- and 450mm-class vehicles). The 250 quad hits the sweet spot in terms of size, speed, and maneuverability. 250s can regularly hit speeds of 40mph, with some designs capable of hitting speeds greater than 70mph! As one can imagine, flying props first into a tree at 40mph (or even 70mph!!!) results in some rather catastrophic, though impressive, wrecks. That is why I recommend getting as much stick time on the cheaper drones first, such as the Hubsan – it can really save you a lot of time and heartache in the long run.
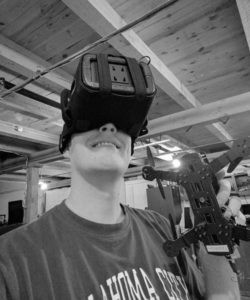
Now, you have a few options for acquiring your racing quad. The first option is to buy a ready-to-fly (RTF) quad. The RTF option will provide you with a drone that you’ll be able to fly out of the box (or nearly so). A couple of good options would be the ARRIS X-Speed 280 and Amimon Falcore Racing Drone Kit (though look around if you’re considering the Amimon Falcore, you may be able to find a cheaper price than what Amazon offers). The alternative is to buy the parts you want for your drone piecemeal and construct it yourself. This was the option I chose when I was ready to move beyond the Hubsan. I picked out a carbon frame, flight controller, motors, props, electronic speed controllers (ESCs), RC receiver and transmitter. I also wanted the ability to fly using first-person view (FPV), so I included an FPV camera, video transmitter/receiver, and FPV goggles.
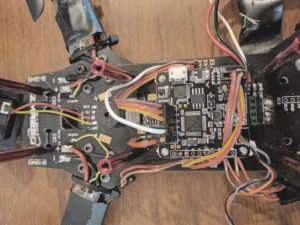
 Just a couple quick notes on my setup: I highly recommend getting a frame that has an integrated power distribution board (PDB), like the one I linked above and pictured here. The frame actually has the circuit board traces integrated into the carbon frame, with specific places to solder your motors, flight controller, and other electronics. This will really help clean up your wiring. I also recommend the Quanum DIY FPV Goggles if you’re just starting out. I’ve been super impressed with those goggles, and they’re a lot gentler on your wallet than what you’ll experience dropping several hundred dollars for Fatshark goggles.
Building your own racing quad can be a bit intimidating, but it’s also a ton of fun and a great opportunity to learn about the different parts that go into the racing drone. Some of the resources I used when building my drone include the Quadcopter subreddit, the FPV Racing subreddit, and Oscar Liang’s blog. Building your own drone also makes it easier to know how to fix it when you inevitably crash it.
SUMMARY
 Drones are a ton of fun to fly and, who knows? With a bit of practice, you might be the next professional drone racer on ESPN! But I would be remiss to not mention some safety warnings. All drones are dangerous, but as long as you fly in open spaces, away from people, and use common sense you should be able to avoid most issues. It’s also why I can’t recommend enough to start with something small and cheap – getting hit with the props will still hurt but you’re a lot less likely to cause any significant damage while you’re in the early learning phase.
I hope that you found this post helpful! Please don’t hesitate to reach out via our contact form if you have any questions. Be sure to check back soon for our next post: How to Get Started with Drones – For Profit!